Jewel Stitch Video

For those of you looking for resources for both the Jewel Pullover and my latest Jewel Hat and Scarf pattern here is a quick video showing how to work the jewel stitch.

I have used both the Knit through the front of the stitches and Knit though the back of the stitches in the patterns – so be on the look out for that specific direction in the pattern!

This Video is brought to you with the video assistance of my 11 year old daughter, Jane. Thanks for supporting our fami

Holiday Inspiration: Knit Christmas Balls

Christmas Balls

I always pick up my needles and knit for the holidays. Always and only in December…usually small things like ornaments and hats. Always thing specifically for gifts and decoration. The exception happen this year when I had the pleasure  of designing in September and publishing in October some holiday knits! I created a few patterns in partnership with Knitting Fever featuring some of the latest  yarns from the Queensland Collection.

I picked up a summer time favorite, Queensland United.  This light sport weight yarn is 55% lambs wool and 45% cotton.  It is not only certified organic it is also a certified non mulesed wool. Queensland United comes in 50g cakes ready to knit from and perfectly sized for projects of all sizes.

I grabbed up some of the plastic craft store clear bulb ornaments as my base and knit right over them using double pointed Lykke needles.  Each ornament takes about an hour to complete if you are also watching tv and talking to your spouse.  I am almost always doing those things when I am knitting. So even if you start today, you could have a few knit before Christmas Day!!

I  wrote up several patterns, many of which are available in print at your local yarn shop or for sale on Ravelry through Knitting Fever.

My gift to you is the free pattern for the first ball shown with the adorable tassel!

Screen Shot 2019-12-03 at 9.26.26 PM

Fall: The Jewel of the Year

But honestly, how are we already here??? This year. This crazy, confusing, ultra challenging year has yielded so much. Some good grit,which has increased my creativity. Some hard times, for certain! But without fail the seasons have changed. Even though we have missed a bunch – here shines the Jewel. The colorful changing of the leaves, the rich oranges and grey greens of the ever fashionable pumpkin as well as the mellow merlot of the maples and decreative corn. All the seasons best accents that begit the color of our favorite jewels.

I always feel like in Fall we begin to look back and bring into focus all that has been good, and will always be good. ( yep… that may be a rift on our pal Rachel Hollis right there, from her latest book Didn’t See That Coming)

Those cozy scarves, tailored blazers, jeans, pumpkin spice everything… some are newer and some are of a certain vintage. But they never cease to please.

Those pleasing vintage feeling are exactly what I wanted to capture in my latest design the Jewel Scarf and Hat. A similar pattern to what was captured earlier in the summer in my Jewel Pullover, a string of seasonal colored jewels dance across a cozy field of garter stitch. The length of the scarf just begs to be artfully draped around your neck.

And what is a cozy scarf without a clever hat to style with it. Enter the Jewel Hat. More of a beanie with a tailored fit and smooth lines, this feminine topper features the same style jewel stitch detail.

A coordinating set would be equally at home hiking through a corn maze (socially distant fun)… or picking apples or pumpkins at the local patch.

For those knitters looking for specific details:

Scarf Gauge: 18 stitches and 20 Rows= 4 inches in garter stitch

Finished Size: 78” by 7.5” laying flat, before adding fringe

Hat Gauge: 18 stitches and 40 rows= 4 inches in garter stitch 

Finished size: Small ( 20”) Large (24”)

The Fiber Seed Sprout Worsted, 90% Washable American Merino 10% Nylon

 250 yds/230m ~ 4.8oz/136g

Color A:  Farmers Market Besprinkled – 2 skeins 

Color C:  Olivine – 1 skein 

Color B:  Ginger – 1 skein 

Color D:  Brambleberry – 1 skein 

From the 5 skeins you can make one scarf and 3 hats in various combinations.

Check out Ravelry for the pattern to make your own, or jump on over to The Fiber Seed and shop for the perfectly matched kit in Sprout Worsted.

Pumpkin Socks : A Revisit of a New Old Favorite

Way, way, way back in The Crooked Stitch Quilts and Knits days of my life I hosted a 6 part Sock Club. We had custom designed socks every other month and a kit that club members received. Kits included custom dyed yarns, pattern and a little gift. One month I even made project bags that were modeled after a little tote bag I had made for Jane Elizabeth to take to the strawberry patch. I think we did the whole think for $25 an installment which seems like a steal now…. It had to be at least 10 year ago… Time really does fly.

Anyway, I designed this cute little pumpkin sock way back when for those lovely customers of mine, but when the club was over I never published the pattern. Well after multiple computer crashes, documents lost and years flying by, I finally found myself in the right season at the right time to write the pattern up and knit a new sample with a currently available yarn!!! Thank Heaven!!!

The pumpkin socks design reminds me of the Ferrum College Folk Life Festival that I loved to visit when I lived in Franklin County, Virginia . The festival itself originally connected me to local knitters. It is where I learn what a DPN was thanks to Dorothea Pierce ( The current proprietor of The Crooked Stitch … Now known as Yarn Seasons) It is where I attempted to walk out my first baby who would hold out on her October 28th Due Date for one uniquely her own. I recall the drive through the freshly cut fields on the way to the college grounds. The stacks of pumpkins that were tucked around once we arrived and the rungs of the split rail fences that hold together my memories of that mountain hamlet. I recall the way the westward retiring sun would leave the surrounding valley glowing gold between the leaves of the trees. And how the sky on that one particular October day in 2008 was the clearest, brightest blue. The air had a cool nip as Dad and I leaned against the fence watching the mule turn the grind stone on the sugar cane to make sorghum and Molasses… all things Dad was entranced with, no doubt recounting if not reliving the days of his childhood on the the family South Georgia farm.

I bet you didn’t think that a little pair of seasonal socks could hold so many memories. For me, it certainly does.

I am so pleased to have partnered with Lindsay at The Fiber Seed for this new version of a long private favorite… The pattern is available on Ravelry for instant download! Even though Halloween is 10 days away, there is still plenty of time to knit up a pair and wear them for Thanksgiving all while making new memories of your own for them to hold.

Sparks Flying: Steek

On my last posts I talked about the benefits of knitting your hem band flat.  I also briefly talked about the placement of steek stitches, but only briefly.  If this is your first steeked colorwork sweater I want to give you a little bit of a run down on how this process works and what you are trying to achieve.

The Steek is the section of knitting that is made for the exclusive purpose of cutting.  Typically 6 stitches wide, you will work this section, this column of stitches the length of the garment where you intend to make the incision.  The stitches are cut in between stitch 3 and 4 of the steek. In the case of the Spark Cardigan at the beginning of the round.You may want to place a marker not only at the beginning of the round but also after the first 3 stitches of the round and before the last 3 stitches of the round.  This will allow you to clearly see the continuation of the columns up the front of the sweater.it these stitches just as you would any other in the pattern, the charted color. Nothing else special happens to the steek until the sleeves of the sweater are joined the body of the sweater is complete.

Sparks Flying: That Belt

Have you started in on your belt?  If not, what are you waiting for? Grab a short needle and get cracking! Tuck that thing away in your car, or in your backpack and work on it a little here and a little there. Believe you me, you do not want to have your whole sweater done and have up to 90” of belt to work on!  And No, you probably can’t knit the whole belt while blocking your Spark Sweater.

Just do it!  I did.  It doesn’t hurt, and you will not regret it.  I promise!

F1DC3027-1BB8-4B9B-AFB4-D15DFD14677C

Sparks Flying: From the Beginning Thinking about the Finishing

I get so caught up in the excitement of starting a new project most of the time I dive right in.  About a year ago, when I was knitting my first Stonecrop sweater I was primed and ready to get knitting.  I had stash yarn that I was pairing with some recently acquired enhancement yarn. I was going to hit the ground running and couldn’t wait to A) get on an airplane for uninterrupted knitting time and B) knit the snot out of this pattern so I could wear it at an event the following week. ( you should know that I did not finish the sweater in a week like I had very unrealistically thought I could)

As I read through the pattern though I discovered something… The sweater started from the neck, knit in the round from the beginning, with the collar ribbing and was intended to be CUT!!! Cut the neck band?!? Cut through what should had been the fishing on the sweater?!? NOOOOOOO!!!

I have had the pleasure of knitting with some very skilled folks in my years in the industry, and while being only a decade into my knitting I knew this felt hinky.  My knitting group throughout time has helped me build my skills and I have learned from so many others knitting projects including the likes of @nellknits and my very own local Elizabeth Zimmerman, Sheila Pierce. These ladies showed me so many tips and tricks. They shared what they had learned along the way.  It is the invaluable lessons that come with social knitting!!!

Through those ladies I learned that to Cut your knitting is fine.  This can be done safely with toothy wool yarn that will essentially Velcro its loose fibers to its neighbors.  Use a good method for securing your raw edge and then cover it over either with ribbon or a picked up and knit band of smaller yarn and you will have a neatly finished object destined to stand the test of time.  But in my experience bands were added to pieces after the cutting.  This gives you not only the ability to remove a worn band 25 years later and apply a new one giving a treasured sweater a new life, but it keeps the raw edge away from high wear areas at the neck and waist. For years and years seamstresses would replace collars in sewn garments as well as replace cuffs if the body of the garment was worth selvaging.  Why not do the same, or have the option to do the same in knitting? It just makes sense to me.

Now what was even more confounding is that the Stonecrop, much like the Spark was a designed in a machine washable yarn.  Yarns that has been treated, even gently  are easier to care for and less likely to felt or stick to itself.  While this makes getting a beautiful fabric tension easier, it would inherently make the life of the garment shorter if  it were well worn and cut from Neck edge to Hem Edge.

Here in lies my next tip – and honestly if you do nothing else from this series except this step, I think you will be pleased.

*** Cast on your hem band, and knit the three inches flat***

In doing this you will only have to cut the color work section of the body.  You will have an open edge at the bottom of your sweater.  You can remove the 6 stitches from the stitch count that will become the steek if you so desire and cast on 6 fewer stitches at the hem.  Then using a backward loop cast on add the 6 steek stitches back before joining in the round. I opted not to do this because we will be picking up a band all the way down the edge of the sweater. I want to maintain consistency in the bulk, but I will only be using ribbon to secure my steeked edge inside the collar band.

57199671-A585-4A66-A4AC-8CCA08046D39

I have linked my Stonecrop post so you can read more about that process.  Ahh… that just feels better to me!

Sparks Flying : Sleeve tips and tricks

Knitting in the round is pretty dang fun. You don’t have to adjust or turn your work, you can pick up a pretty good speed with making your stitches, and the best part is NO PURLS!!  With color work, carrying two yarns and alternating them behind your knitting, it is important to knit in the round with consistency.

EFD589E3-DD09-4E3B-A027-726634078626

Now with small circumference knitting, like sleeves you have to be extra mindful of how your stitches are looking.  When blocked, uneven stitches in most color work even out.  The tension of the stitches sort of self balances with the float, or unused yarn that goes between worked stitches of alternating colors.   The floats are key to having nice even work.  You want to keep them loose, but not droopy.  With a smaller circumference I like to use a few extra steps to make sure this happens.

My first suggestion is to go ahead a grab double pointed needles.  Even though they can be awkward, you have a more even surface of the face or public side of your knitting.  The circular shape is less distorted on double pointed needles. This can be a big life saver and make your knitting smoother.

Second, if the thought of double pointed needles and color work makes you feel sickly then skip them!! There are no rules, you have to do what you feel comfortable with.

If Magic Loop is best for you, then do that. Not only will you be less likely to have a stitch escape your needle, you will feel more comfortable and that leads to looser stitches and more even tension too.  If you still feel like you are not meeting the tension or gauge you desire take one extra step: ( my third suggestion)  is to work your rounds with your sleeve turned inside out.  The face, or public side of your knitting is on the inside of your needles.  It is still the part of the work you are looking while knitting at but you are carrying your yarns around the outside of your work.  This is a minor change that can have major impact because your floats are just a smidge longer. Longer floats mean more even surface stitches!!


DD7BE271-39E6-4543-B40C-ED25E9109FAA

You can see above, with my sleeve turned inside out I am still looking at the public side of my knitting while working stitches.  They are sitting on the back needle instead of the front needle as I work. Nothing else changes.

Fourth tip for small circumference knitting and really any magic loop knitting:  Place your beginning of the round marker and them adjust where your excess cable come through your work. By changing the placement of the cable, moving it over a few stitches every couple of rounds you distribute the “disruption” of the cable and can prevent a ladder or unintended looseness in your fabric.   You can move this between pattern repeats pretty easily in color work and once you are done knitting your work will be nice and even.  I do this ALL. THE. TIME.

Lastly – and might I say as a last resort – use a different needle size than you intend to work your sweater.  The Spark pattern suggests this, but many years ago and while working on a different project that also recommended  changing needle size for a specific section of knitting  a knitting guru that I know said she hated that this suggestion was made in writing.  Her views were that knitters would take it as gospel and utilize this technique weather they needed it or not.  I though over this statement and I whole heartedly agree.

Now armed with these tricks for sleeve knitting, (Ha!) you can execute your sleeve knitting with great success!


Sparks will be Flying


Happy knitters, it has been quite a year. I have missed knitting groups, conversations and the general friendship that is synonymous with knitting.

When Andrea Mowery releases her Spark and Spice sweaters I was immediately in love. Then people started talked about it being the 2020 Rhinebeck sweater I got super excited. I love her color work designs, and I love Rhinebeck. While the festival won’t be held this year I though it would be fun to work on the sweater and add some commentary for best practices. I love working with a beautiful design and making sure I execute some additional skills for the best possible finished sweater. I hope you will join me and use this outline for success. I will be supplementing this information with posts on my blog as well as Instagram posts for near daily updates not only on progress but on the how-to part of working through this sweater.

Cheers- and let’s hear it for Copious Fibers bringing us all together!

  Follow along on Instagram: @adventurewithwhitney

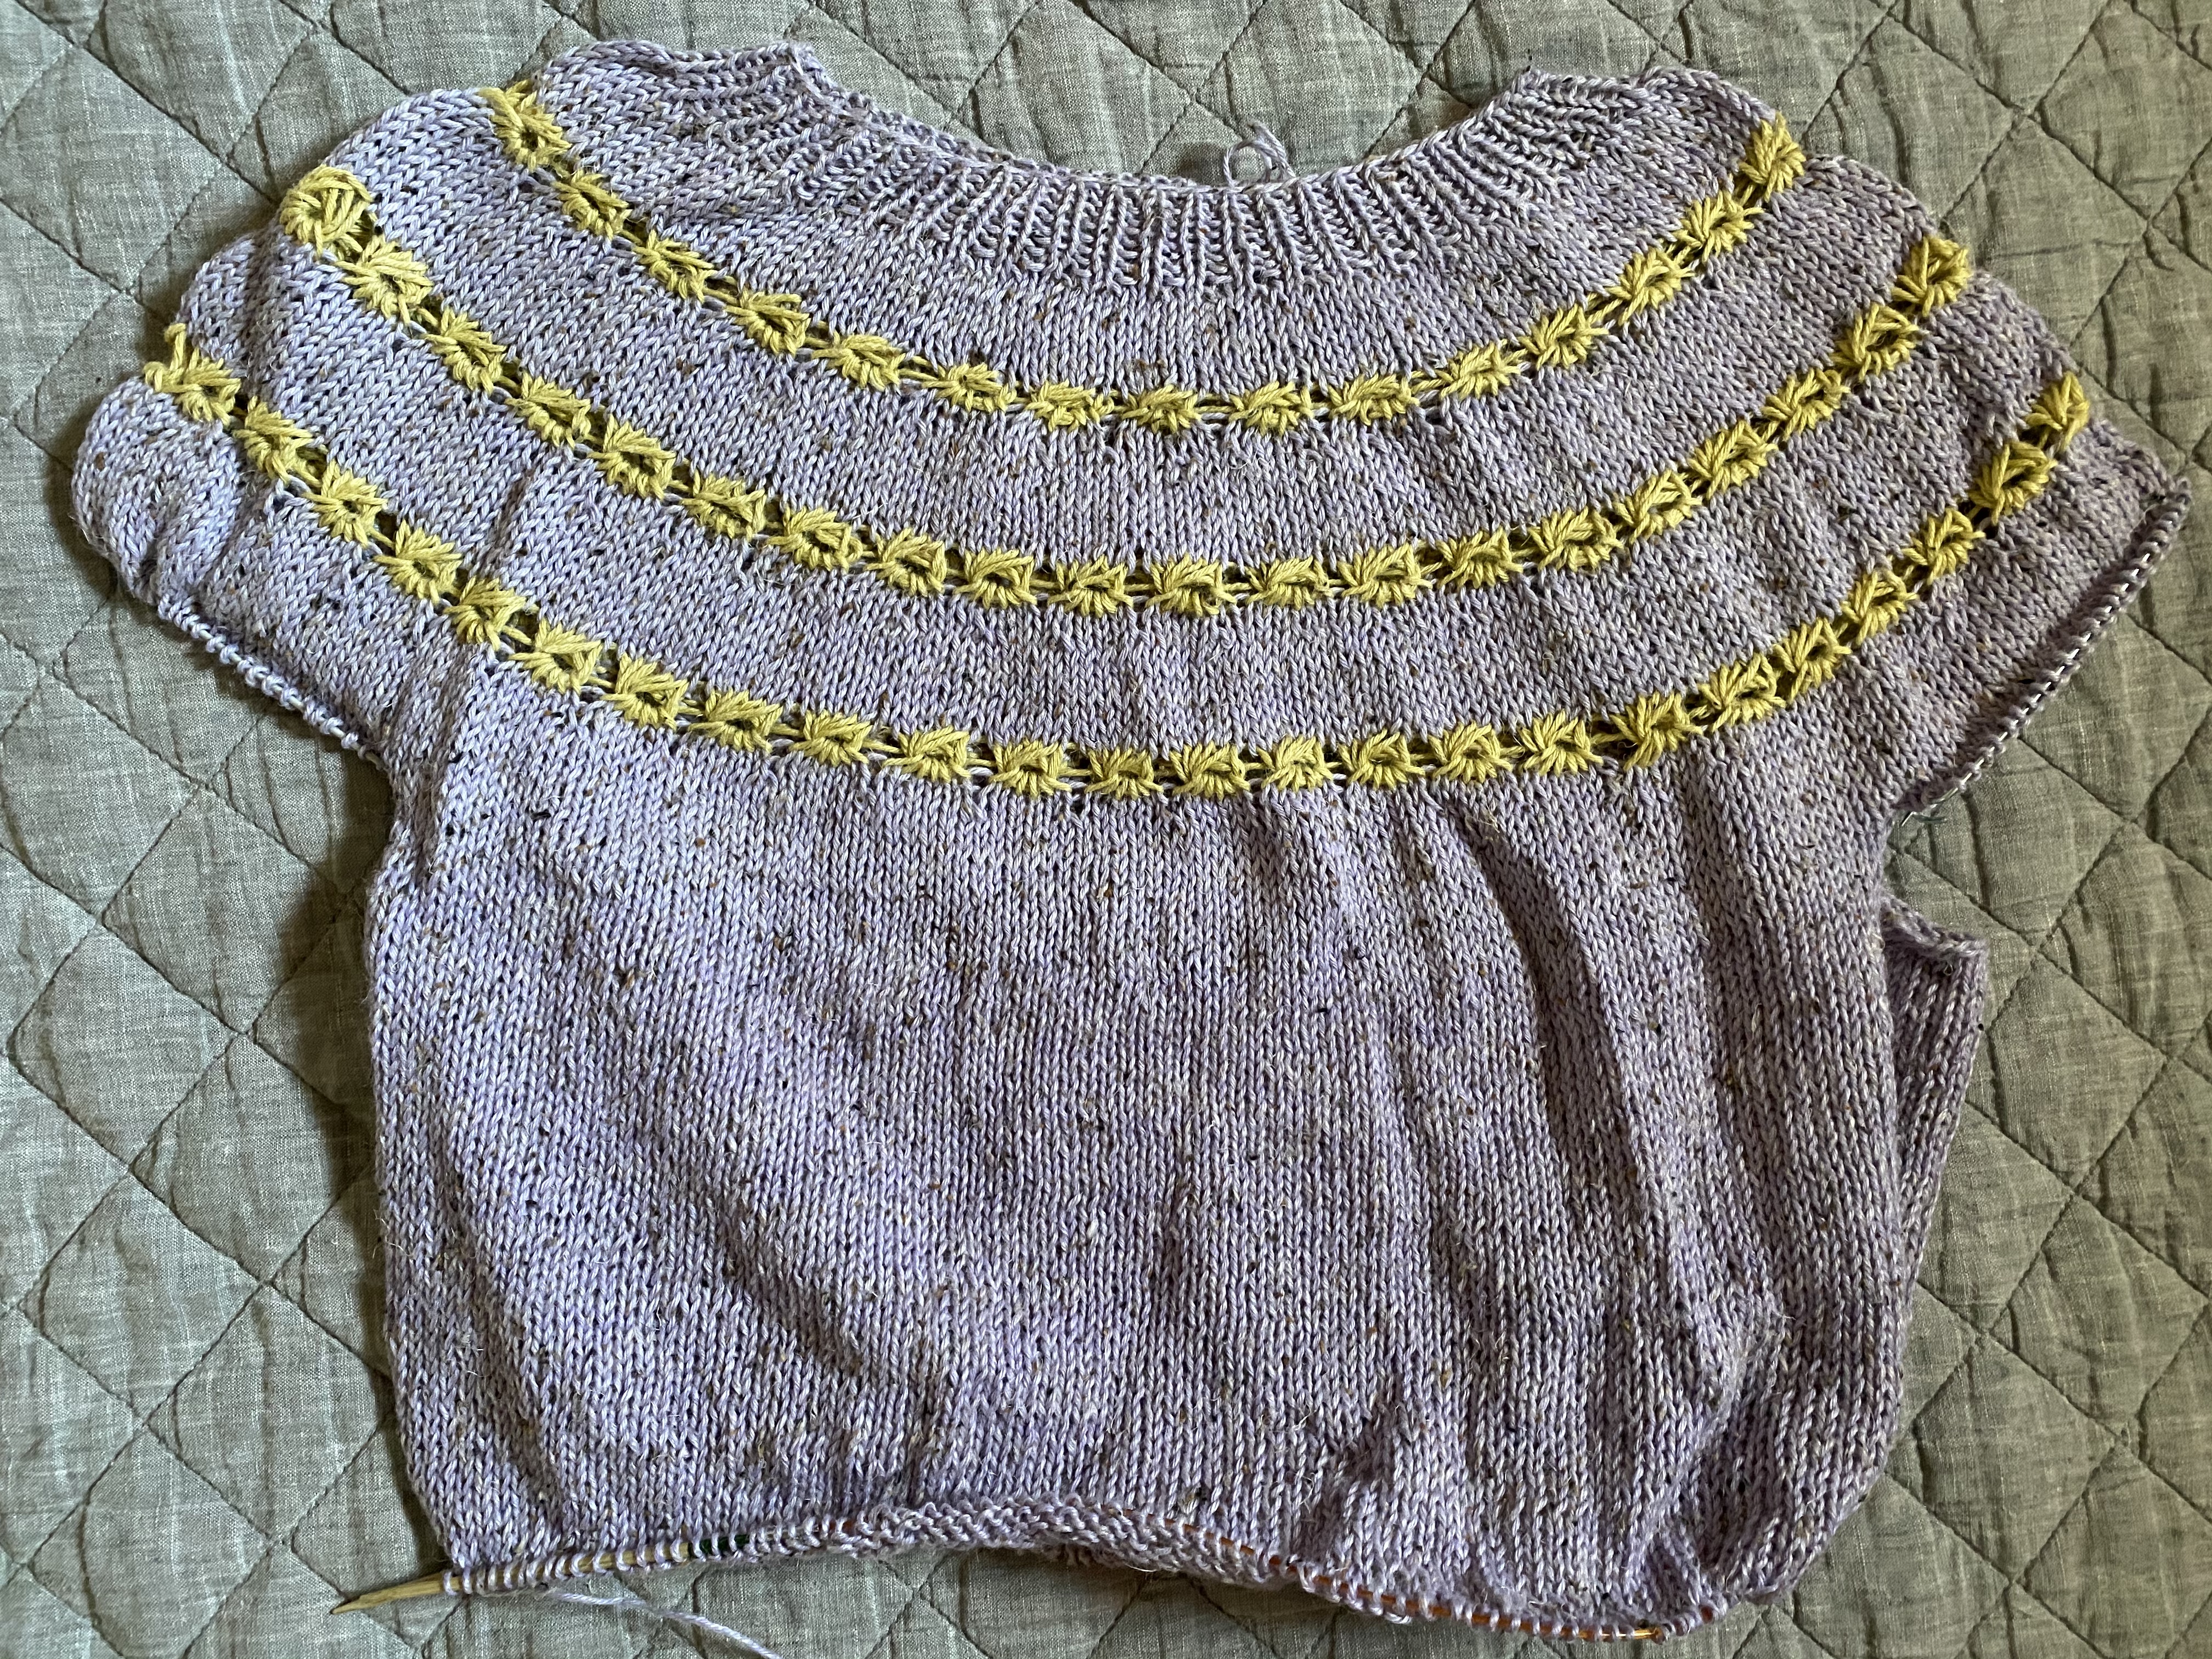
First thing after printing off the pattern you will want to choose a size.   Spark is designed with 2” of positive ease so that the shawl collar band swill overlap.  There are notes saying that up to 6” would be appropriate.  I personally know that I will likely wear the sweater handing loose, at possibly consider buttons to help hold my sweater closed. I also do not want to look as though I am wearing an oversized robe. This leaves me knitting a size 46 which is more like 4” positive ease.  I am alright with that!!

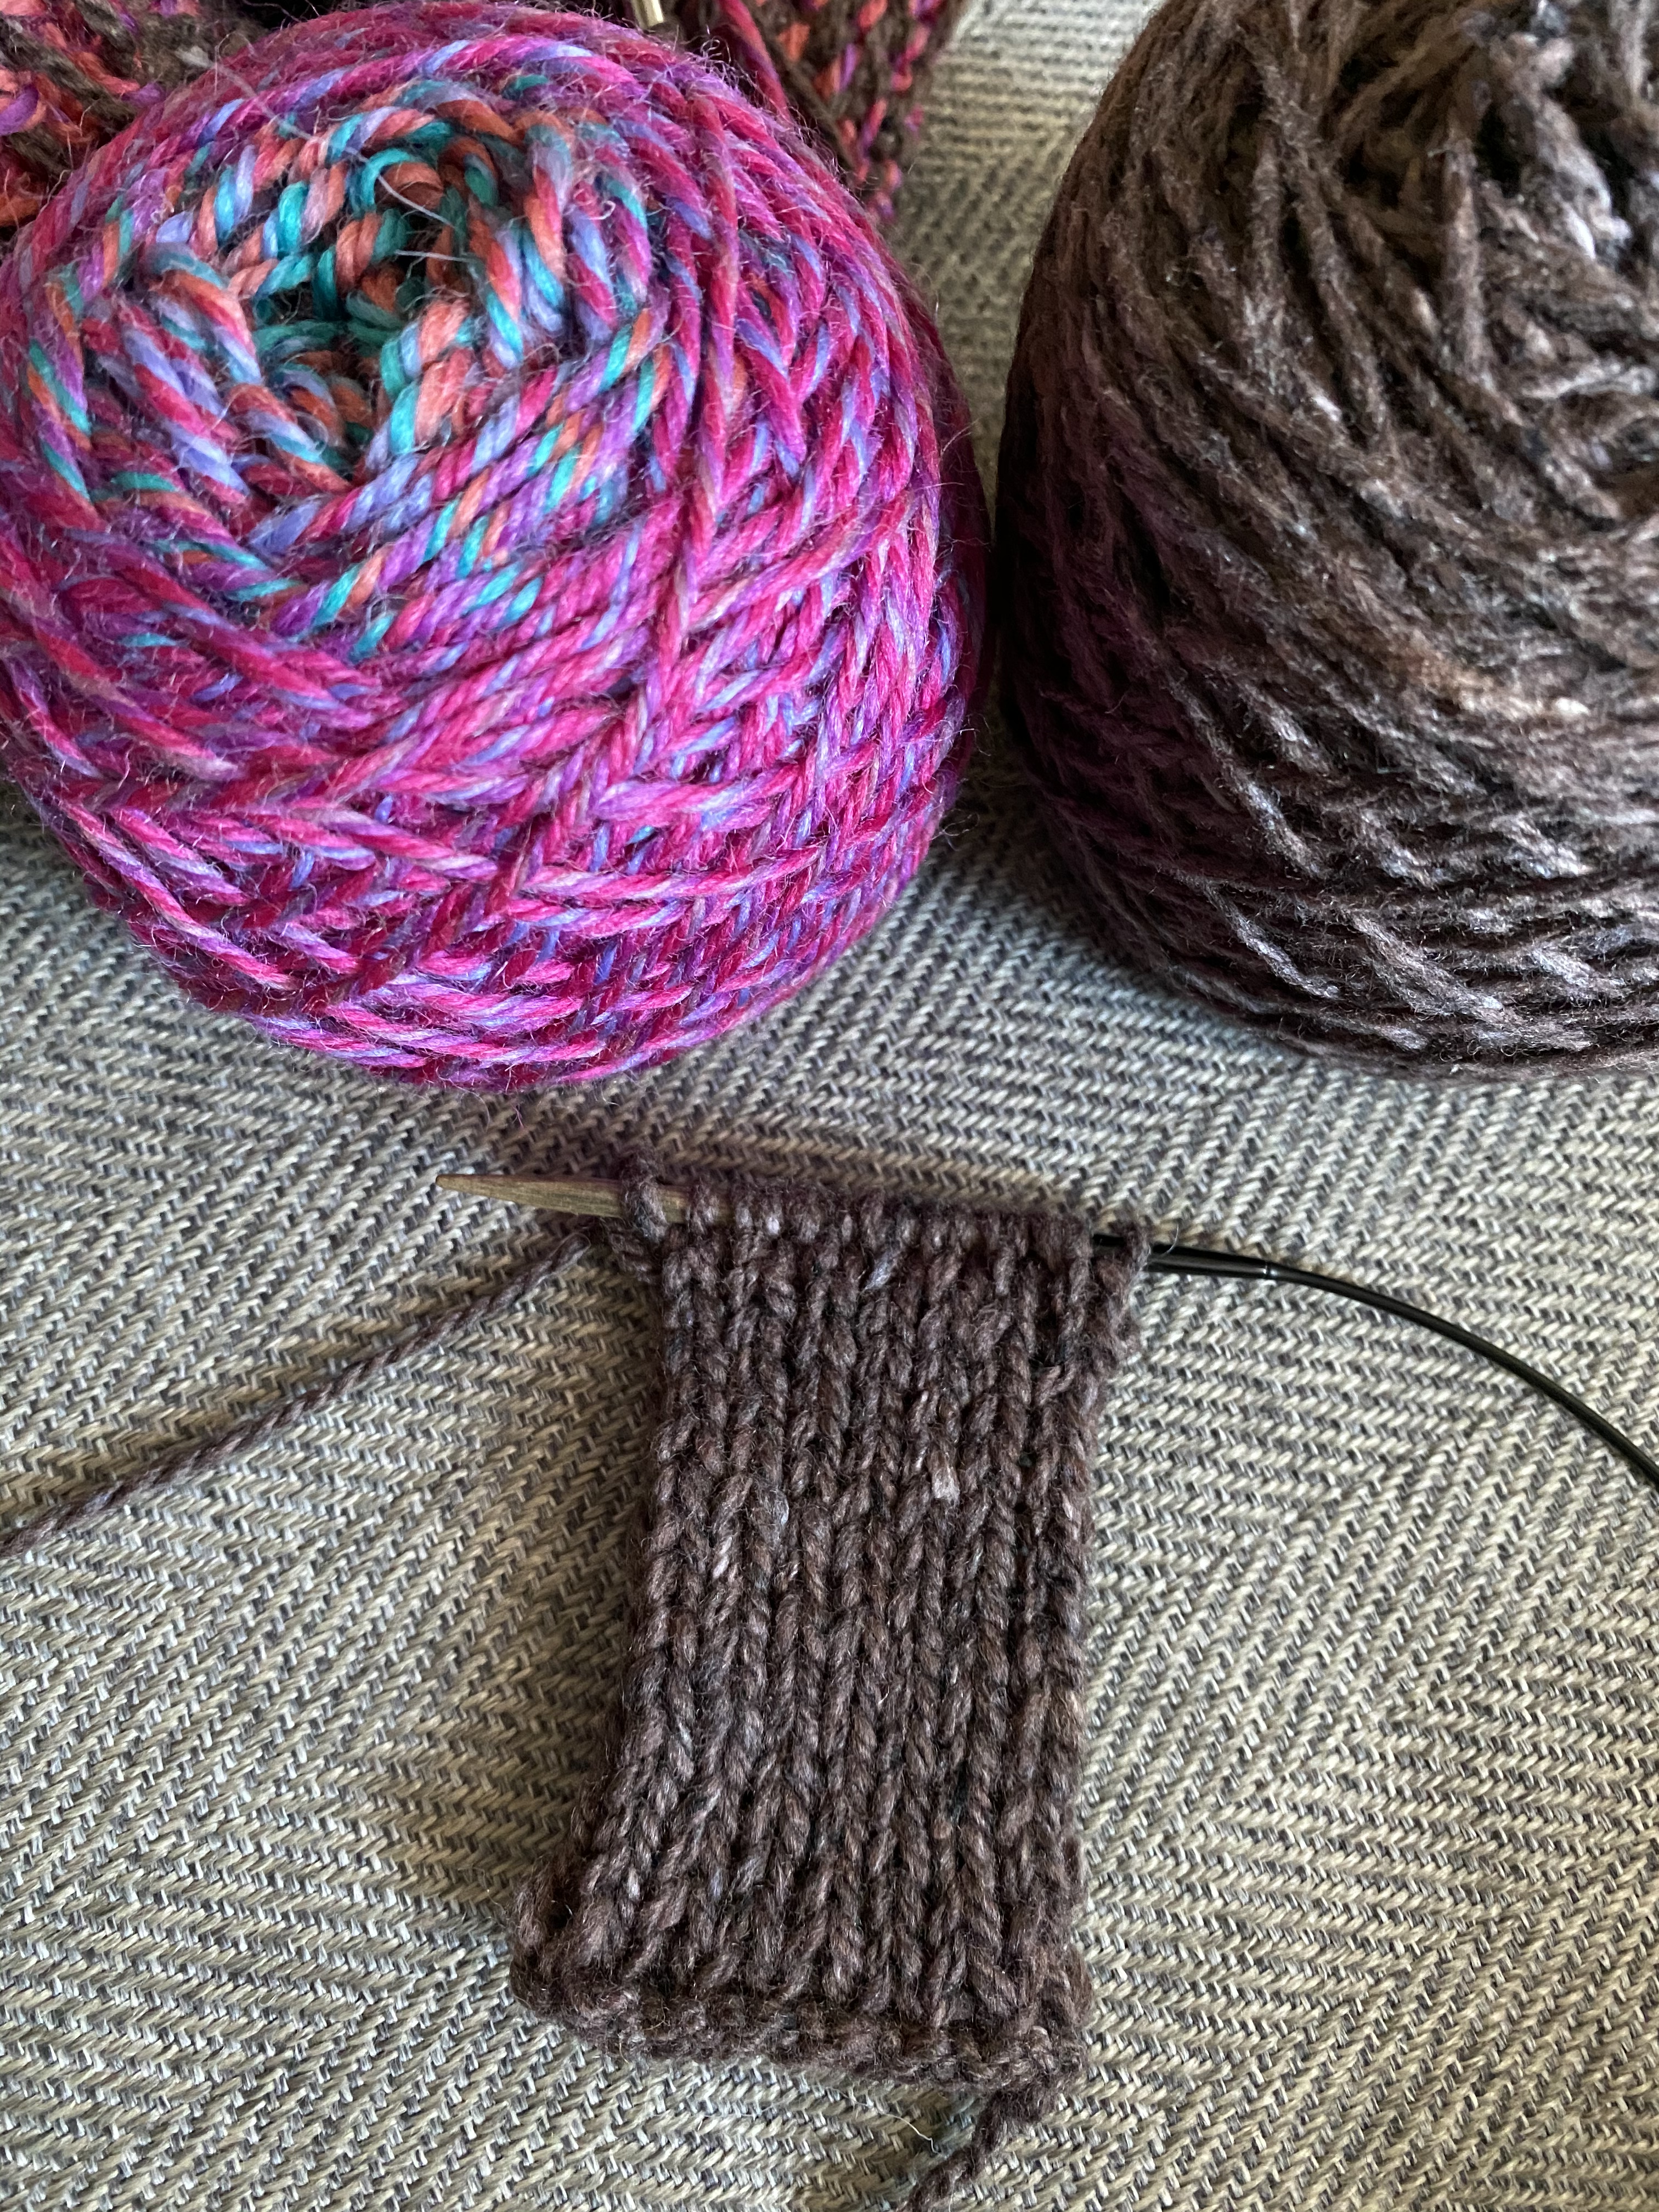
Now picking yarn is the most fun, next to knitting.  I wanted to pick something similar in style to the yarns used in the design. I also wanted to pick something that would be easy to get my hands on and easy to work with. I chose my all time favorite yarn Kathmandu Aran from Queensland Collection to be my main color and Brisbane, also from Queensland Collection to by my contrast.  Brisbane changes color beautifully and is a 100% Australian wool.  It is machine washable, but in this sweater it wont be a problem even though it will be steeked.

Brisbane is a dense yarn that the company has rates a bulky.  For all of time I have not 100% agreeded on yarn ratings.  I don’t think that someone in an office should be assigning yarn weight.  Most of the time they use yardage and weight to determine the weight. While this is a helpful way to look at yarn, it is also helpful to be a knitter and be able to make a decision as to weather you like a fabric or not.

Kathmandu is a Merino, Silk and Cashmere blend that is a two ply Aran  It can stand up to anything because of the way it is spun.  When you knit it, it stays in place and will look the same on day one as day 100.  I love this, and the subtle tweed.  I like the contrast between the “rustic” quality of the tweed and the modern feeling of Brisbane.

Once your yarn is sorted out and you have enough yardage it is time to start that swatch.

Truth be told, I have knit with Brisbane and Kathmandu quite a bit.  I went ahead and just dove in on a sleeve.  If you are very familiar with the yarn you are using and have recently taken notes knowing what size needle you used, the type of needle weather metal or wood, and the gauge you achieved then I think this is a safe way to start out.

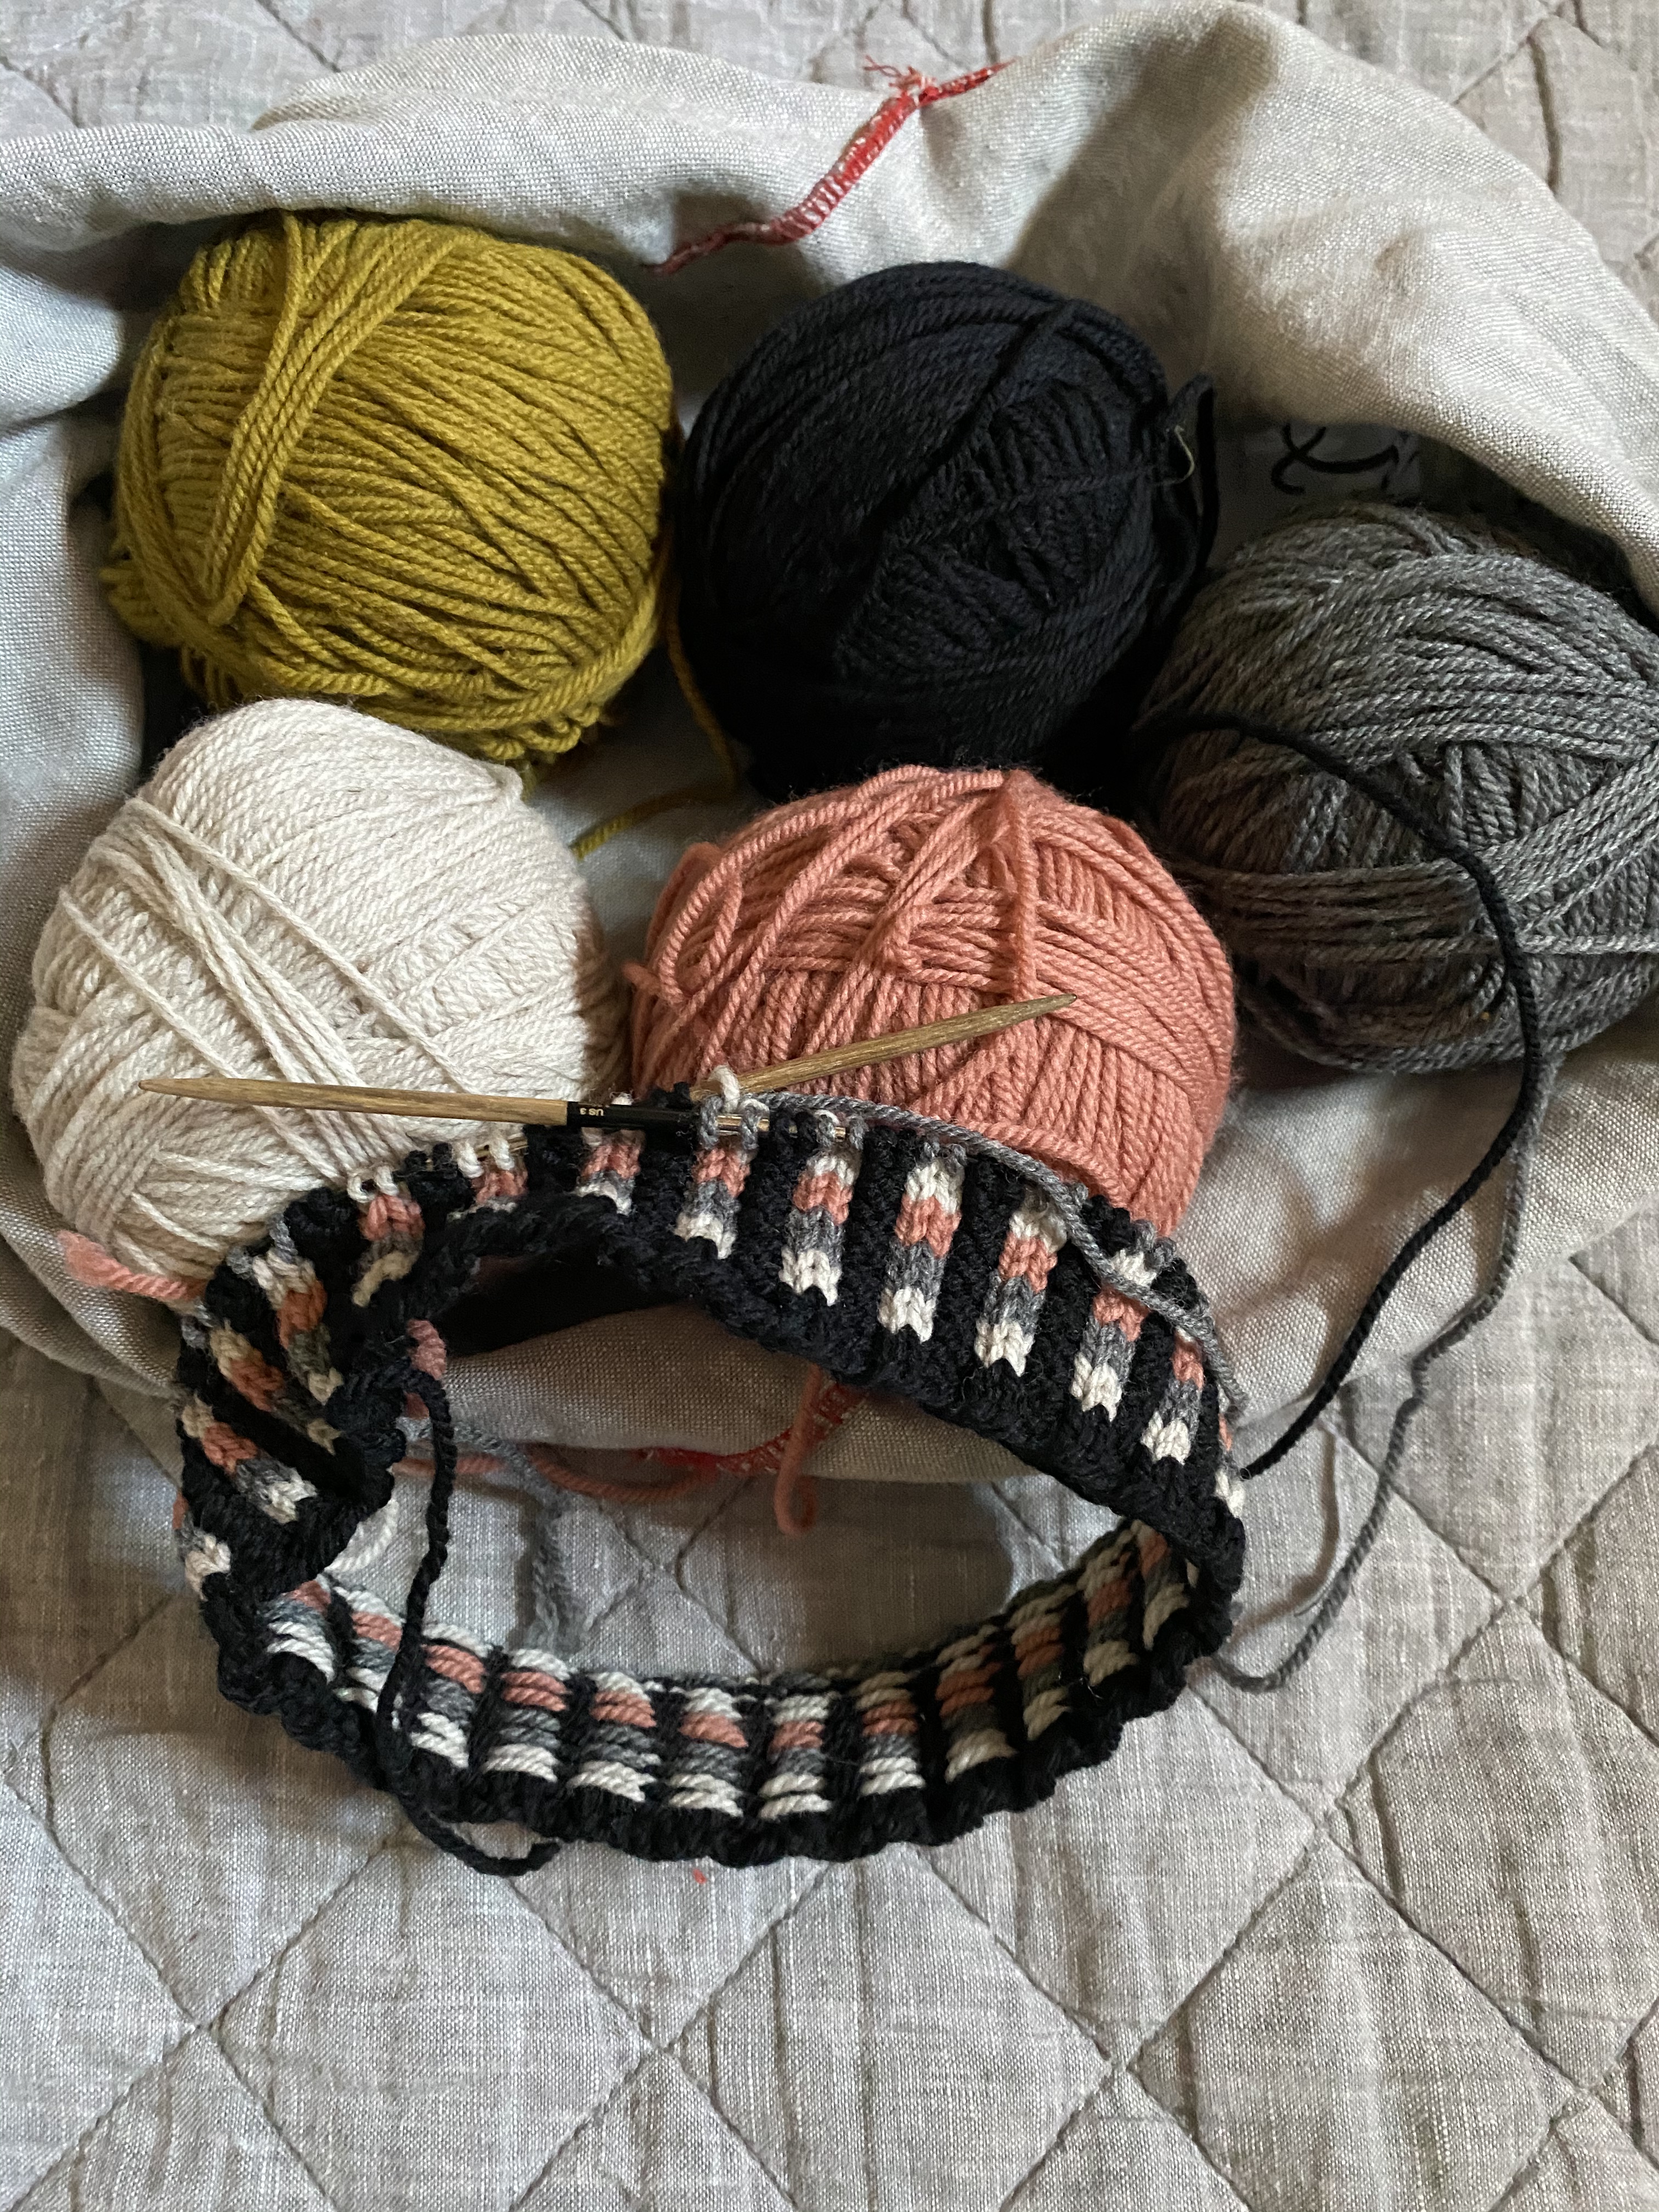
If not all those qualifications above apply to your recent knitting history, knit a gauge swatch in the pattern of the main fabric of the sweater.  That is using chart B and a working a swatch in the round, just like the sweater will be knit. I would recommend 20 or 30 +2 stitches and instead of joining your swatch in the round, knit the first and last stitch through the back of the loop. Then carry your yarn along the back of the work.  You can cut those floats and block your swatch flat and get a really good idea of how your work is going to look. Once you like your fabric and your gauge is where it should be for the pattern ( 20 sts and 22rnds =4”) then you are ready to dive into the sleeve knitting!

You are set up for the first steps of success.

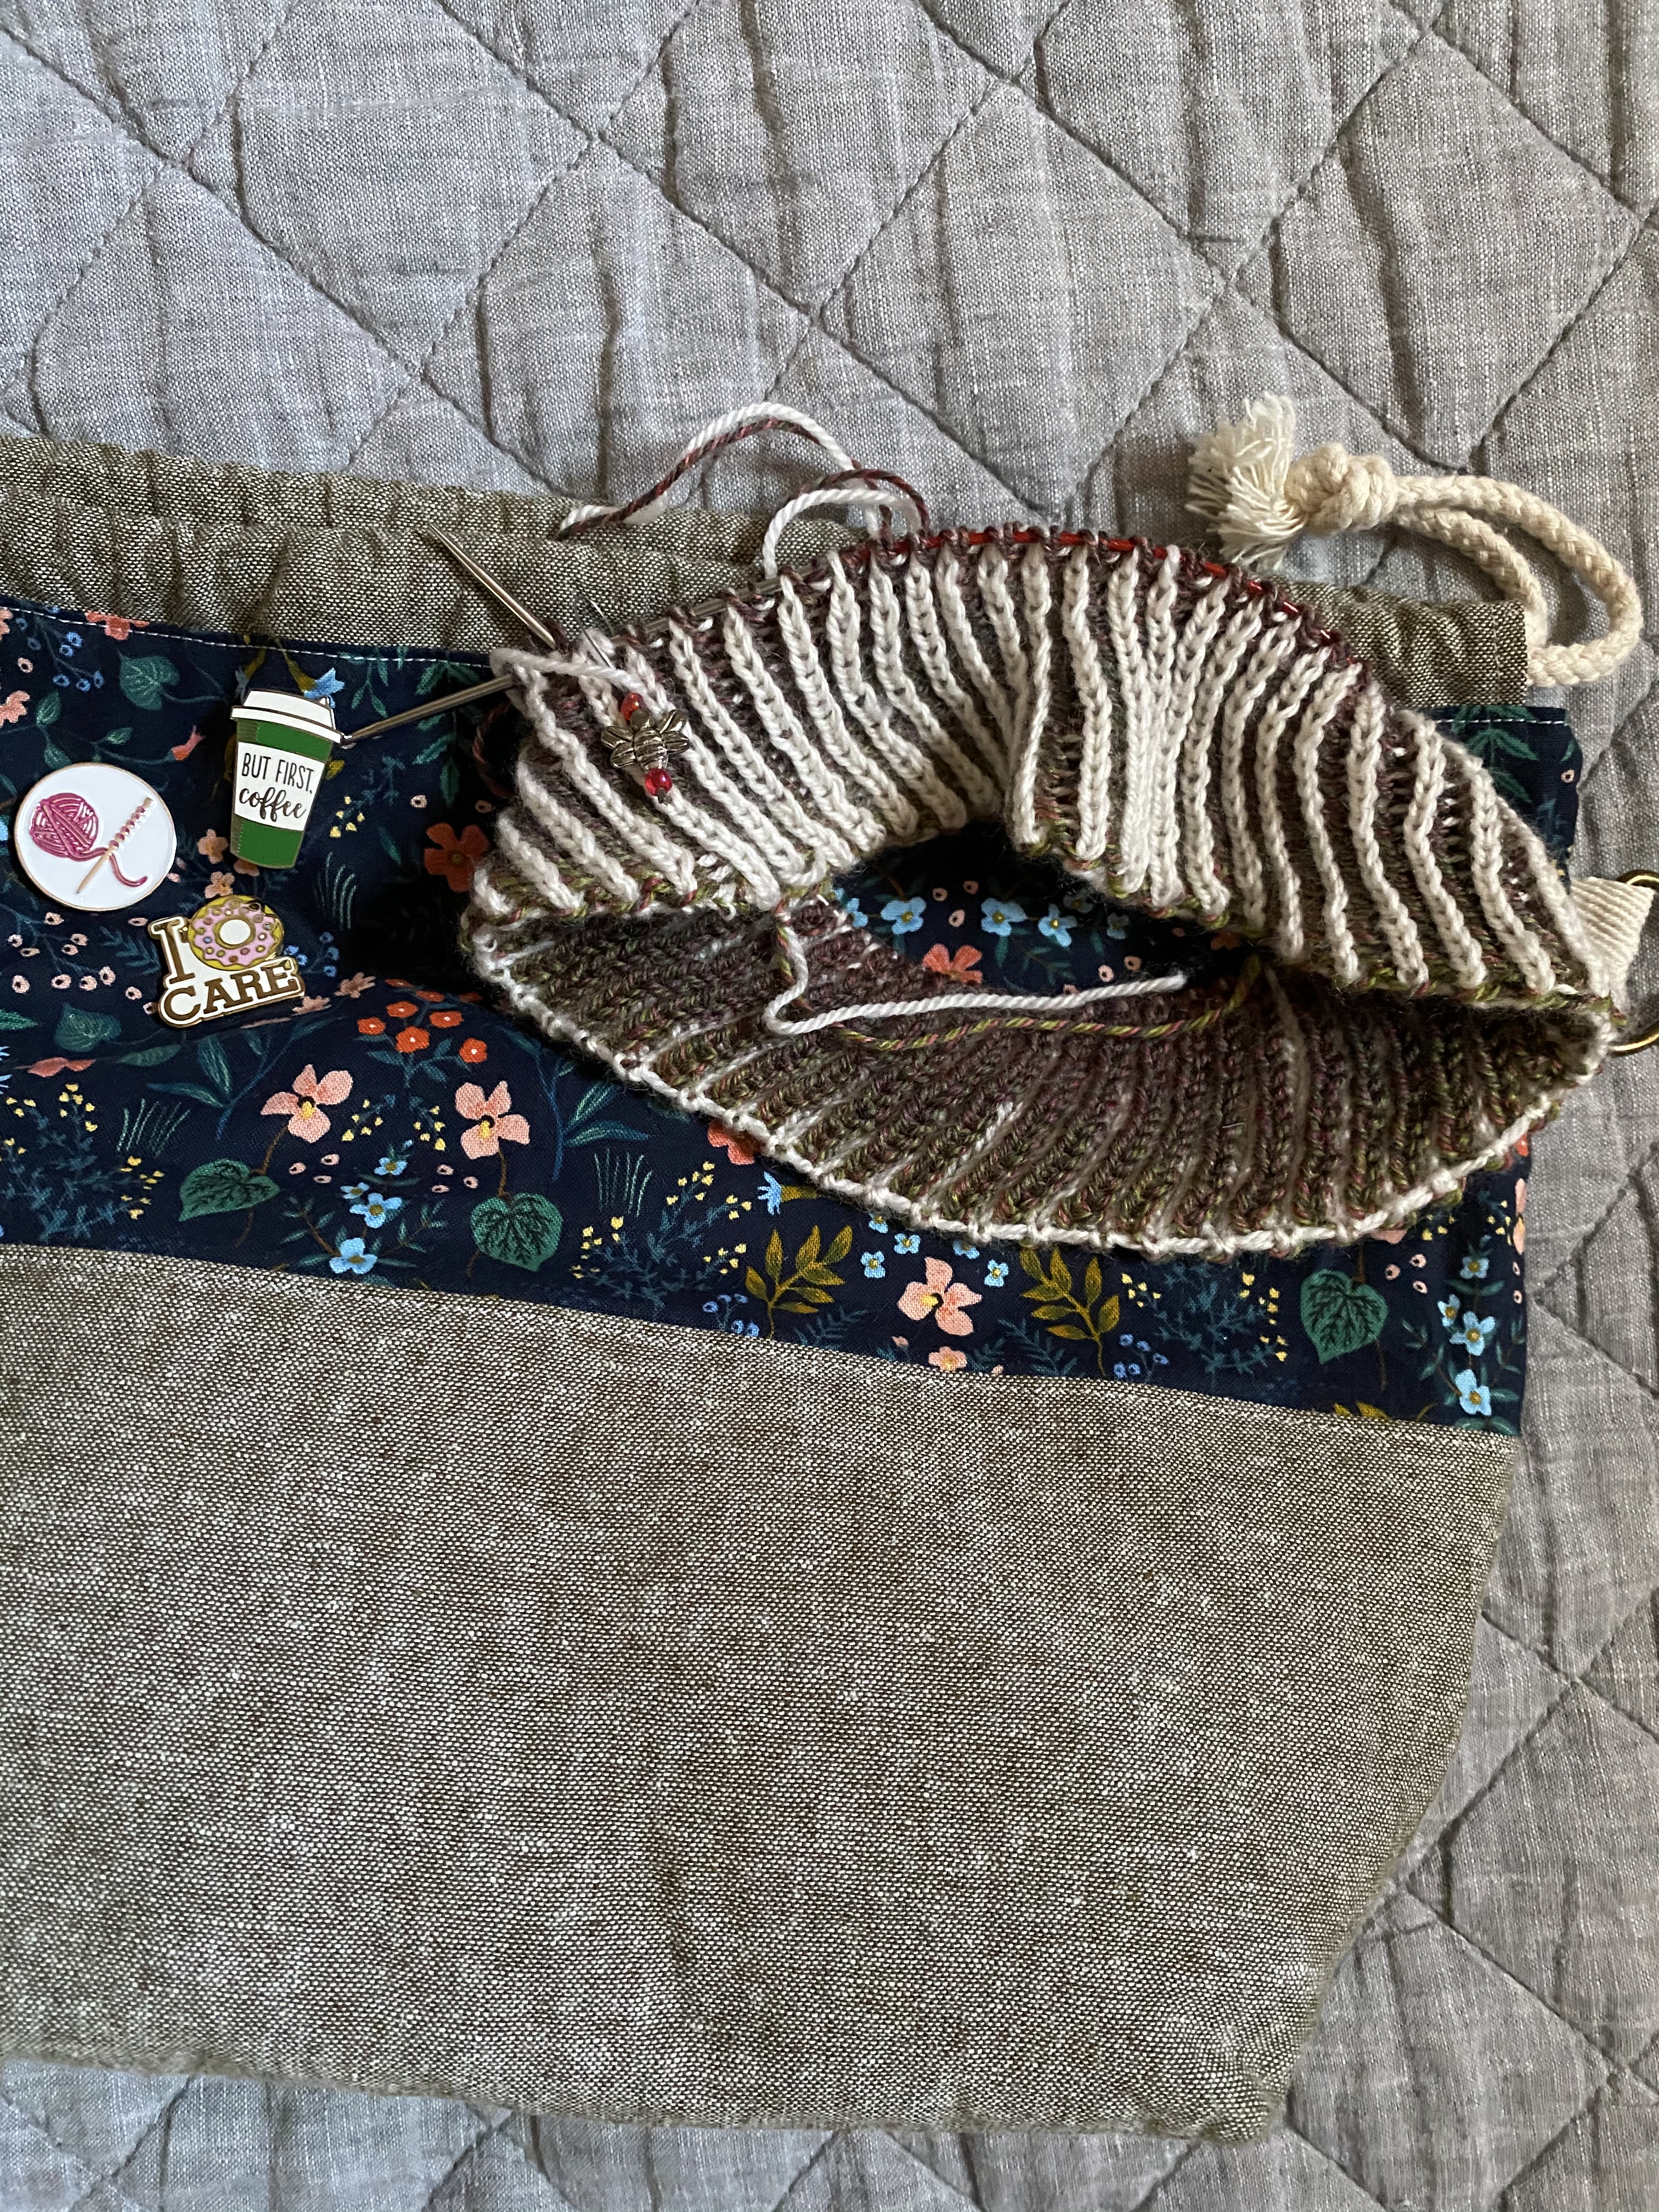
In addition to all this I strongly recommend starting to knit your belt.  If you don’t start now, you will:

A) Likely be 100% annoyed when you have only the belt to knit at the end of the sweater.

B) Opt never to knit the belt, possibly be sad that you are not able to style the sweater with said unknit belt, and perhaps not wear the sweater at all.  Now that would be a disgrace, because I know it is going to be beautiful!


B76C3305-9CB1-4A57-946C-1FA3F9FF0C89

July is For Finishing

July is a hard month in the Fiber World – Yarn shops struggle with sales because regular customers typically go on vacation, meaning traffic is lighter and the temperature is high making knitting a lower priority for some knitters. It has made for slow business when I was in the retail end of the Fiber Industry and it makes for slower travel and appointments now that I am in a consulting role.   This year, 2020 is alarmingly different.  With the pandemic sales are slower on fashion products and higher on staple products, online sales have skyrocketed and some smaller businesses are still closed because of the risk of people being too close together.  It is an all together tough time!

I myself find bogged down by not only the heat of July but the projects that I have started over the course of the “ colder” months.  Some projects I am desperate to have in my wardrobe, others I wonder why I started them in the first place.  For the last 10 years I have take a personal challenge that “July is for Finishing”. Along the way some friends have joined in.  We each take stock of the unfinished projects of “works in progress” that are taking up room in our bags, boxes, corners and stashes.  From this source, a month long plan comes forth: Identify what you really want to finish, or what has obligation to finished.  Eliminate any project that you no longer want to invest any time in by ripping out the work and reclaiming the yarn and needles. Last but not least, commit to knitting!

Over the course of a month a lot of unfinished projects can turn the corner and become finished projects.  Some of those will be welcomed into seasonal rotation come Fall, some will make the jump to being particularly spectacular holiday gifts.  By the time the pumpkins start showing up in the decor section of your local craft depot you can have sense of refreshment in regards to your stash of projects! This year I have 6 projects I really want to get knocked out.

B354A391-8FF9-4E5B-8091-97FD2E60C0DE5767AF4A-53BF-475E-B954-034F82BE8397A10373ED-7308-4896-A826-3EDECFD276A7B2444741-719D-4F35-B782-562409CA7F01F6518F5B-68A4-41B8-91E2-DA87707298E8D575FB6B-C22A-46C5-B37D-C56EEA19E075


First up is a Lilac linen blend Jewel Top – that is set for publication in the next week.  This sample will head up to Cowgirl Yarn in Laramie,Wyoming for display with the full range of cool summer colors of Mirasol Ch’ichi

The next two- the Shetland Wool Week Hats  for 2020 and 2018.  I love colorwork and going back to traditonal designs is always fun.

The 4th project is a Jade color sweater in Mirasol Ushya – Way back in February my friends at Knit on Pearl in Jackson, Wyoming told me about a 4 hour- 4 skein knit from Good Night Day.  I spent at least 4 hours trying to decide what needle to use. Ha!!  So here is hoping that the knitting goes even faster.  Ushya is a very popular and squishy merino yarn, I am hoping this will be a great car coat this Winter.

How about another hat – This Harlow Hat by Andrea Mowery has been on the needles for just shy of a year.  It was my designated flying/ Knitting project.  But I haven’t been on a plane for months, and don’t plan of flying any time soon.  Guess this one needs to be bumped up in the que.

Last by not least is a Petite Jardin sweater for Sam at Old Soul Fiber Co.  I am just waiting for a brighter flower color and then this one will be under way.

I may add a few more projects along the way –  I have a few more in the stash, but this group seems achievable and respectable for a month of knititng.

Join in, won’t you?  I share my. Finished projects on Instagram using the tag #julyisforfinishing.